Cardamom Loaf

A simple, tasty treat that will go perfectly with a cup of chai. This is a very easy to make bake, my 11 year old daughter made the one pictured!

Ingredients

  • 200g unsalted butter, at room temperature
  • 200 granulated sugar
  • 10 cardamom seeds, peeled and crushed
  • 3 eggs
  • 200g plain flour
  • 1tsp bicarbonate soda
  • 1/4 tsp salt
  • 1tsp vanilla extract
Cardamom Loaf

Cardamom Loaf

Method

Pre heat oven to 170C.

Grease and flour a loaf tin and set aside till needed.

Mix the butter, sugar and cardamom well until it is light and creamy.

Add the eggs, one at a time, mixing well after each addition.

Sift the flour, bicarbonate soda and salt together and add it to the batter carefully and mix until all ingredients are well incorporated.

Lastly add the vanilla extract and mix it in.

Pour the batter into the prepared loaf tin and bake for around 55 minutes or longer if needed.

Farro’s (Birmingham) Review

My Rating: 4.5/5

Family Friendly: Yes

Address: 402-406 Stratford Road, Sparkhill, Birmingham. B11 4AD

Parking: Yes – but limited. Easy street parking available nearby; try Beach Rd, Alfred Rd or Fulham Rd for proximity.

Payment: Cash and (thankfully) Cards accepted

Farro’s is new to Birmingham and the 2nd restaurant of its branded Grillhouses, the first being in Nottingham. Opened on the 16th August 2019 it serves a blend of Portuguese and Italian inspired food – and they do burgers and steaks too.

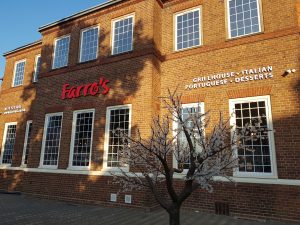
Farro’s is located in an imposing converted pub right at the junction of Warwick Road and Stratford Road in the Sparkhill area of Birmingham. For those of you familiar with Brum you might recall the once mighty ‘The President’ buffet restaurant was on this site for many years before it closed and dereliction followed. I’m glad to say the site has been refurbished and the blight of broken windows and dumped rubbish is gone. The exterior is bright & breezy with a large new courtyard complete with a Birmingham Bull, a kindred spirit to the one outside the Bullring perhaps?

farros board

We parked on a side street as the main car park is relatively small and was already full. As we arrived into the lobby we were swiftly greeted by the front of house manager who took our name and advised us that being a Saturday evening and having requested a table for 5 we’d have to wait up to 30 minutes. Happily the wait was shorter than expected but it did give us time to absorb the atmosphere and observe the hive of activity represented by the waiting staff flitting from kitchen to service to tables and back again.

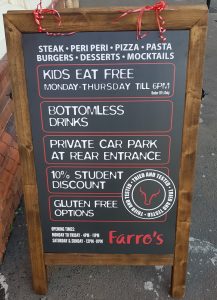
Once ushered to our table we were provided menus and quickly realised that ordering was exactly Nando’s style. Bottomless drinks as standard with a single refill area.

farros menu

Menu

Starters

We had the lamb chops which were succulent, perfectly cooked if a little towards the rare side on parts but still downright tasty. Served with a nice mint sauce.

farros lamb chops_

lamb chops

We also punted for the garlic bread with mozzarella, which was generally well received but seemed to lack a bit of garlic for something with garlic in the name!

Mains

Avoiding the build your own burger and steak options this time around we opted for the following:

The Sizzler (mixed chicken & beef in small strips), presented on a hot platter and cooked with onions and peppers it was literally sizzling when it arrived on our table and remained piping hot for a good while afterward. I

farros sizzler chicken beef

sizzler – chicken & beef

found the beef to be lovely (although my husband complained he had to work at it) and like the chicken it was flavoured nicely with the juices from the onion and pepper mix.

The Sizzler menu has great flexiblity as there were chicken, beef, lamb & prawn only options with the ability to mix any of them.

The peri peri chicken we had was also piping hot and we had to let it cool a little before tearing into it. We opted for medium spice (I would go up a spice level next time if eating with the family, it simply wasn’t a medium for us) however the flavour from the rub was excellent and gave it the edge over many other peri peri restaurants.
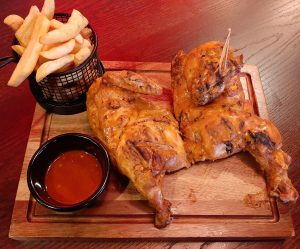
farros peri peri full chicken

peri peri chicken

I would have preferred if the chicken skin was crispier, but that’s my personal preference. It came with a side of chips but we also ordered an extra side of sweet potato fries which were the best ones I’ve had so far. They were perfectly cooked. Delicious.

We also ordered the lasagne which was not as creamy as you normally get in other places which is a good thing, often the béchamel sauce overwhelms everything else layered into a lasagne. The kids found it easier to eat as it wasn’t too heavy.

farros lasagne

The margherita pizza was stone baked and it was enjoyed by all. We didn’t try any toppings on it but the kids rated the pizza as one of the best they’ve had so far, next time we’ll go all out! We always prefer the stone baked pizzas to the usual you get from your local pizza joint, which is one of the reasons we miss La Favorita so much.

farros margherita pizza

The general atmosphere of the restaurant was nice and buzzing, it is quite spacious overall with plenty of seating and good separation between areas. The music was in the background so you could easily hold a conversation without shouting at each other. Male and female toilets are in separate areas but below ground level down a flight of stairs, they were clean and had a dedicated wudu area as well as a separate prayer room for men and women. There is a disabled toilet available on ground level.

Desserts

Although we didn’t order any desserts this time, the options to chose from were quite limited. The usual waffles, sundaes and old school desserts feature on the menu. It would have been nice to see Portuguese and Italian desserts on the menu such as Pasteis de Nata (Portuguese custard tart) or Tiramisu.

Drinks

Bottomless drinks to choose from as well as juices and mocktails. Cold water, ice and a mixed option available too. I had the Pina colada which is my favourite mocktail and it did not disappoint.

My Rating

My 4.5 rating for Farro’s is based mainly on 3 criteria, but I factor in additional observances such as cleanliness, location etc.

Food: 4.6/5

Service: 4.0/5

Atmosphere: 4.8/5


farro's steak options

farro’s steaks options
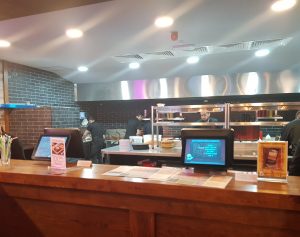
farro's exterior

farro's ordering

farro’s ordering

farro's entrance

farro’s entrance


Fish & Coconut Curry

A really simple and easy curry to make – I normally use frozen basa fillets (I let it defrost before using). The syns in this recipe come from the coconut milk, please check the syns if you use a different brand. I get the coconut milk tins from B&M Bargains (4 for £1 – a real bargain!) and it is just the right size. Each tin is only 7 syns, divided by 3 of us works out at less than 2.5 syns per serving. I used to buy the bigger tins of coconut milk and only use half a tin and throw the rest away, so I’ve stopped doing that. This curry is lovely served with coconut rice if you don’t mind using more syns.

Serves: 3

Syns: 2.5 syns per serving

Time Taken: 30 minutes

Difficulty: Easy

Fish & Coconut Curry

Fish & Coconut Curry


Ingredients

  • 1 medium onion, finely chopped
  • 3 cloves of garlic, finely chopped
  • 200g passata
  • 1.5 tbsp curry powder
  • 1/2 tbsp dried fenugreek leaves (methi)
  • 1 veg oxo cube, crumbled
  • 165ml tin Full Moon coconut milk
  • Firm white fish fillets

Method

Spray a pan with plenty of syn free spray oil and cook the onion till lightly golden. Add hot water if the onion starts to stick to the pan.

Add the chopped garlic and fry for another couple of minutes. Add the fenugreek leaves, curry powder, crumbled up oxo cube and passata and cook the spices down for about 10 minutes.

Add the coconut milk and the fish fillets and cook on a gentle heat. Try not to stir the fish too much or you’ll end up with broken pieces. Instead, gently shake the pan when you need to.

Served with boiled basmati rice and a speedy salad.

Carrot & Walnut Halwa Cake

This is a recipe inspired by the super talented Saliha Mahmood Ahmed (Masterchef Winner 2017) from her latest recipe book ‘Khazana’. The original recipe contained a variety of different nuts as well as sultanas but I have adapted this slightly and used only walnuts in this recipe. The original recipe also asked for the cake to be cooked in 2 tins but I am quite lazy so ended up using only 1 deep cake tin (10′ round tin), which meant that the cooking time for my cake was a lot longer. If you split your cake batter into 2 tins, remember to reduce the cooking time accordingly.

Overall this was quite an easy cake to bake and it was enjoyed by everyone!

Carrot & Walnut Halwa Cake

Carrot & Walnut Halwa Cake


Ingredients

  • 200g light brown muscovado sugar
  • 3 eggs
  • 250ml sunflower oil
  • 50ml milk
  • 300g plain flour, plus extra for coating cake tin
  • 1 tsp baking powder
  • 1 tsp bicarbonate of soda
  • 50g butter
  • 100g caster sugar
  • 400g finely grated carrots
  • 1 tsp ground cinnamon
  • 1 tsp ground ginger
  • 100g walnuts, roughly chopped (plus extra for decorating)

Icing

  • 300g cream cheese
  • 125g icing sugar
  • 100ml double cream

Method

Pre heat the oven to gas mark 4 and grease a cake tin with spray oil and flour. Set aside till needed.

Mix the muscovado sugar, eggs, sunflower oil and milk in a large bowl and whisk until all ingredients are well combined. In a separate bowl, sift the flour with the baking powder and bicarbonate of soda and set aside.

Melt the butter and the caster sugar in a pan till all the sugar has dissolved. When the butter has foamed, add the grated carrots and mix thoroughly. Cook for about 5 minutes till the carrots have softened and add the spices, mixing it well into the carrots. Remove the pan from the heat and add the chopped walnuts and let it cool slightly.

To finish the cake batter, mix the bowl with flour into the bowl of wet ingredients alongside the cooked carrots. Mix it thoroughly with a wooden spoon and pour the batter into the prepared cake tin.

Bake in the oven for around 75 minutes. After that time is up, check if the cake is done by inserting a wooden skewer into the middle of the cake. The skewer should come out clean if its done, if it doesn’t, then bake for a further 10-15 minutes till it is done.

Once the cake is baked, let it rest in the tin for a few minutes before removing it from the tin and let it cool completely on a wire rack before icing it.

To make the icing, put the cream cheese in a bowl and mix till it is smooth (this only takes a few seconds, try not to be tempted to over mix it or you could end up with runny cream cheese!). Add the icing sugar and the double cream and mix till it starts to thicken and it is smooth. Again don’t be tempted to over mix as you could quickly end up with a very runny mixture and you won’t be able to ice your cake.

Once your cake is completely cool, cut it in half and add some icing to the middle. Sandwich the cake together and use the rest of the icing to spread all over the top and sides of the cake. Use a palette knife to create a smooth finish. Use more chopped walnuts to decorate the cake.

Cupcakes

I asked a while ago on my Instagram poll if people wanted to see non SW food on my blog and the majority did so here is one to start off with. This is a very easy and simple cupcake recipe, my go to recipe, it is so easy to make that even my younger kids can make them (they’re 8 & 10 years old) without any supervision from me. Obviously if your children have never cooked before, please make sure you supervise them at all times.

If you’d like to work out the syn values for the cupcakes, you’ll need to work out the syn values for each ingredient and then divide it by the number of cupcakes made. The recipe below makes 12 cupcakes and I’ve worked out the syns value for you this time (without the icing) but that is not something I will be doing for future recipes – I have a lot of dessert and cake recipes to share and knowing the syn values will shock me and you! I will leave that for every reader to work out for themselves.

So, when using a light margarine such as Flora light to make these, the syn value for each cupcake will be 5.5 syns. If you choose to use regular margarine then the syns go up a little, each cupcake will then be 7 syns each. It is not that high to be fair and homemade goodies always taste so much better than shop bought, so definitely worth the syns. You could potentially have 2 cupcakes within your daily syns allowance!

The kids decorated the cupcakes simply by mixing icing sugar with water (until they got a sightly runny consistency) and topped them with sugar strands and balls and mini marshmallows. You can buy halal mini marshmallows from your local Asian supermarket but I like to get mine from Leicester – from a place called Mr. Burger! (yeah it is not a restaurant, they sell a whole range of frozen goodies and things from South Africa too, as well as tubs of halal sweets).

Don’t forget to tag me on your posts when you make these, I love looking at everyone’s posts, and feel free to share the recipe x

Cupcakes made & decorated by the kids

Cupcakes made & decorated by the kids


Makes: 12 cupcakes

Time Taken: 30 minutes

Difficulty: Easy

Ingredients

  • 115g margarine
  • 115g self raising flour
  • 115g caster sugar
  • 2 eggs
  • 1 tsp vanilla extract

Method

Beat the sugar and margarine together till light and fluffy.

Add in the eggs, one at a time, and mix thoroughly after each addition.

Add the flour and try not to overmix at this stage. Add the vanilla.

Pour the mixture into 12 muffin cases and cook in a pre heated oven for 15 minutes on gas mark 4.

You can check if the cupcakes are cooked by inserting a toothpick in the middle of one cupcake. If it comes out clean, then your cupcakes are done! If not, then leave them to cook a little longer. Try not to be tempted into opening your oven door too early, this may result in sunken cakes!

Firecracker Chicken

Last night I decided to try another one of Spicentice kits – Firecracker Chicken! I adapted the ingredients slightly to adjust to what I had at home and it was delicious.

I thought Firecracker Chicken sounded spicy and was worried that the hubby would find it too spicy but it had just the right amount for him and the kids. I added chilli flakes to mine as I love hot food! I eat super spicy food so for me this was a mild spice kit but I know many will probably find this just right for them. Below is the list of ingredients you will need to make this recipe with the spice kit, it is quite a straightforward recipe.

I used Crucials Chilli Ketchup for an added spicy kick but you can use just regular ketchup. Remember to double check syn values for yourself as different brands of sauces vary in syn values.

We all loved this meal and would have it again.

Enjoy x

Spicentice Firecracker Chicken

Spicentice Firecracker Chicken

Serves: 4

Syns: 2 syns per serving

Time Taken: 45 minutes (plus marinade time)

Difficulty: Easy

Ingredients

  • 3 chicken breasts
  • 2 medium onions, chopped
  • 1 tbsp ginger/garlic paste
  • 1 cup peas
  • 1 pepper
  • 1 lime
  • Spring onions
  • 2 tbsp tomato ketchup
  • 4 tbsp dark soy sauce
  • 2 tbsp hoisin sauce
  • 1 tbsp plain flour
  • Spicentice Firecracker Sachet
  • Jasmine rice to serve


Firecracker Chicken with Jasmine Rice

Firecracker Chicken with Jasmine Rice

Method

Chop the pepper and onion into quarters, and chicken into bite sized chuncks.

In a large bowl add the tomato ketchup, hoisin sauce, soy sauce, the juice of 1 lime, 100ml water and Spicentice Firecracker Sachet. Then add 1/2 tbsp. ginger/garlic paste and the chicken. Mix all ingredients together and leave to marinade for at least 15 minutes.

Heat low cal spray oil in a wok over a medium heat. Add the remaining ginger/garlic paste and stir fry for a few seconds. Scoop out the chicken from the marinade and stir fry until the chicken is almost cooked through.

Add plain flour to the leftover marinade sauce and whisk thoroughly. Add to wok with extra water if needed (100ml). Allow to simmer, then add the onions, peppers and peas. Stir fry for 5-10 minutes and then garnish with spring onions.

Serve Spicentice Firecracker Chicken with Jasmine Rice.

Spice-N-Tice Meal Kits

I came across Spice-N-Tice when one of my lovely members and friend gave me a very thoughtful gift – Chilli Rocks! Some of you may know that I absolutely love chillies and spicy food, so when the lovely Halimah (@Halimah_official on Instagram, please check her out and give her a follow) gave me this, I was just over the moon.

The chilli rocks came in a pack of 6 different types of chilli pots ranging from an earthy, sweet and mild heat from Sweet Ancho to the world’s hottest chilli on record – Carolina Reaper! Perfect gift for chilli lovers like me and those who like it hot, hot, hot!

Chilli Rocks

Chilli Rocks

The fab people at Spice-N-Tice got in touch with me and kindly sent me some of their Meal Kits to try out . I was hoping to have tried a few of the kits by now but have been super busy with the summer break and have only tried one so far and it did not disappoint!

Spice-N-Tice Meal Kits

Spice-N-Tice Meal Kits


I tried the shawarma style Turkish Doner Kebab and even my fussy younger children loved that. All of the spice kits came with a shopping list and a very easy to follow cooking instructions. All of the meal kits I was sent were gluten free, vegan friendly and Slimming World friendly.

Shawarma Style Doner Kebab

Shawarma Style Doner Kebab


Keep an eye out for more about these spice kits on my instagram page – @Rahema_m

For a 20% discount code you can use the code RM20. Let me know in the comments which of the spice kits you have tried and is your favourite. Feel free to share the code with friends x

Bulgur Wheat

Bulgur wheat is a great alternative to rice or couscous. It is a Free Food and quite easy to make.

I used 120g of bulgur wheat and cooked that in with 600ml cold water for around 15 minutes. I also added one vegetable stock pot to it for flavour.

After the 15 minutes, I drained the water and added chickpeas, some garlic granules and chilli flakes.

Bulgur Wheat

Bulgur Wheat

When I made it again the other day, I added feta cheese to it and it was amazing!

We had it served with Peri Peri chicken and salad. It was delicious! You can add anything to the bulgur wheat – peppers, cherry tomatoes, sweet corn etc.

How do you have bulgur wheat when you make it? Comment below with your ideas.


Mozzarella & Chilli Pasta Bake

This is such an easy and simple dish to put together and it tastes amazing! It is one of my daughter’s favourite dish. I have adapted the recipe slightly from the SW Veggie Deluxe recipe book and have made this quite cheesy (just the way we like it!). You can have 70g of reduced fat mozzarella cheese as healthy extra A choice but you can use less if you prefer or put a mixture of mozzarella and cheddar cheese, but remember to count the syns depending on how much you use. All the other ingredients in this recipe are Free.

Serves: 3

Syns: FREE (if using the cheese as healthy extra A choice)

Time Taken: 30-45 minutes

Difficulty: Easy

Mozzarella & Chilli Pasta

Mozzarella & Chilli Pasta


Ingredients

  • 300g dried pasta
  • 1 onion, finely chopped
  • 1 tbsp. Very Lazy garlic
  • 1/2 tbsp. Very Lazy chilli
  • 500g carton passata
  • 2 x Maggie seasoning cubes
  • 100g frozen peas
  • 210g reduced fat mozarella

Method

Pre heat the oven to gas mark 4.

Cook the pasta according to the packet instructions, drain well and run the pasta under cold water to stop it sticking together. Set aside till needed.

Whilst the pasta is cooking, make the sauce. Fry the onion, garlic and chilli in a pan with low cal spray for about 5 minutes or until softened. If you find the onion is starting to stick to the pan, add some of the water that the pasta is cooking in (around a tbsp. at a time if needed).

Add the passata and the seasoning cubes, stir and simmer for 3 minutes. Add seasoning if needed. Add the frozen peas and cook for a further 2 minutes then remove from the heat.

Mix the cooked pasta into the sauce, ensuring the pasta is well coated. Tip the pasta into a medium sized baking dish sprayed with low cal spray. Top with the mozzarella and bake in the pre heated oven for around 12-15 minutes till all the cheese is melted.

Fried Rice with Salt & Pepper Chicken

This recipe was one that was put together in minutes and have had many people asking me how I made it, so here it is. Apologies for the delay lovelies.

I used this Salt & Pepper Spice mix that I made following the Pinch of Nom recipe: http://pinchofnom.com/recipes/syn-free-salt-pepper-chicken-slimming-world/

It isn’t just adding salt and pepper to the chicken like I thought it was when I heard people talking about salt and pepper chicken in group! Please tell me I am not alone in thinking that 🙈 The spice mix makes quite a lot so once you’ve made some, you can store it in an airtight container and use it next time you need it. It is definitely worth making it! If you don’t have the time to make it or cannot be bothered with the hassle, you can buy ready made Salt & Pepper Spice kits from places like JD Seasonings (https://jdseasonings.com/product/salt-pepper-chips/).

I didn’t really measure anything with this recipe, you can add as much or as little soy sauce, chilli flakes and salt & pepper spice mix as you like.

I cooked the chicken in the actifry, here’s a link to the one I have: https://www.tefal.co.uk/Cooking-appliances/Healthy-Fryers/ActiFry-Original/p/1500637231

Fried Rice with Salt & Pepper Chicken

Fried Rice with Salt & Pepper Chicken

Serves: 2

Syns: FREE

Time Taken: 20 minutes

Difficulty: Easy

Ingredients

  • Cooked, leftover rice
  • Packet of stir fry veg
  • Soy sauce
  • 2-3 chicken thighs, chopped
  • Salt & Pepper spice mix
  • Chilli flakes

Method

Spray a wok with a low cal cooking spray and fry your stir fry veg. Once they’re cooked, add the rice and soy sauce and mix well together till the rice is heated.

Sprinkle the salt and pepper spice and chilli flakes on your chicken before placing it in an actifry and cook for 20 minutes.

That’s it! Really simple and so quick to make. Hope you enjoy it x